Every welder knows the satisfaction of laying a perfect bead. But a weld that looks good is only half the story. True quality goes deeper—it’s about creating a joint that is strong, reliable, and free from defects that could cause failure down the line. For small fabrication shops and serious hobbyists, mastering weld quality isn’t just about pride; it’s about reputation, safety, and profitability. The cost of a single failed weld—whether in rework, material waste, or a damaged reputation—far exceeds the time it takes to get it right the first time.
This guide provides a practical framework for improving your weld quality. We will cover visual inspection techniques, simple shop-friendly tests, common defects and their fixes, and the basics of documentation. By implementing these practices, you can ensure every joint you produce meets the standards your projects demand.
The First Line of Defense: A Visual Inspection Checklist
Your eyes are your most powerful and immediate quality control tool. A thorough visual inspection can catch more than 80% of welding defects before they become a bigger problem. Before you even think about more advanced testing, train yourself to look for these specific cues.
Develop a consistent routine. Examine the weld in good lighting, using a flashlight and a magnifying glass if needed. Here’s what to look for:
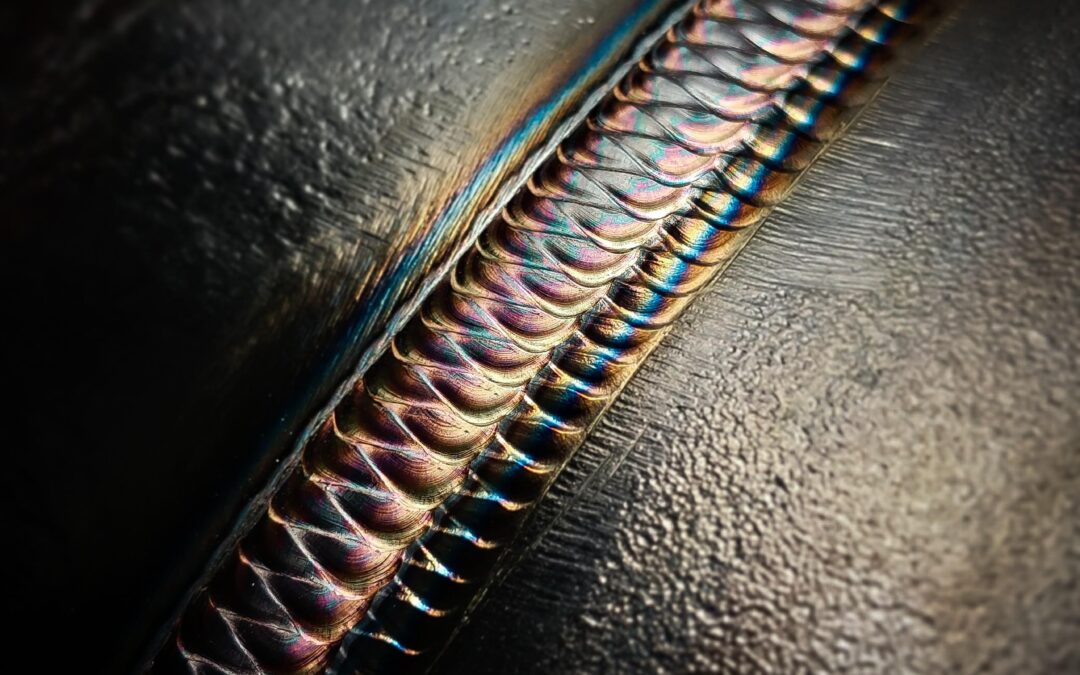
- Bead Profile and Consistency: Is the weld bead uniform in width and height? It should have a slightly convex shape (for a fillet weld) without being excessively humped or too flat.
- Toe Blending: The edges of the weld (the “toes”) should blend smoothly into the base metal. Sharp transitions can create stress points.
- Fusion and Penetration Indicators: Check for visible signs that the weld has fused properly with the base metal. On the root side of a butt joint, you should see consistent penetration.
- Heat-Affected Zone (HAZ): The area of base metal next to the weld will show discoloration from the heat. A consistent, uniform HAZ suggests good heat input control. An overly wide or erratic HAZ may indicate issues with travel speed or heat settings.
- Porosity: Are there any small, circular holes on the weld surface? This indicates trapped gas and is a clear sign of contamination.
- Undercut: Look for a groove or notch melted into the base metal at the weld toe. This weakens the joint and is a common defect.
- Overlap: This happens when the weld metal spills over the toe without fusing to the base metal. It creates a stress riser and is a sign of poor technique or settings.
- Crater Fill: At the end of the weld, is the crater properly filled? An unfilled crater can cause cracks.
- Start/Stop Marks: Where one bead ends and another begins, the transition should be smooth and fully fused.
- Spatter: While not always a structural defect, excessive spatter requires costly cleanup and can indicate incorrect machine settings.
Quick Pass/Fail Cue: A good weld looks clean, uniform, and “flows” into the parent metal. Any signs of pits, cracks, sharp edges, or inconsistency are red flags that require further investigation.
Shop-Friendly Weld Testing Methods
Visual inspection is critical, but some defects hide beneath the surface. You don’t need a full-scale materials lab to verify your weld’s integrity. These simple destructive tests provide excellent feedback on your technique and settings. Always perform these tests on scrap coupons, not on your final workpiece.
Bend Test
The bend test is one of the most effective ways to check for fusion and ductility.
- Equipment: A hydraulic press or a sturdy vise and a large hammer.
- Process:
- Weld two plates together (typically a butt joint).
- Cut a strip from the welded plate, about 1.5 inches wide.
- Grind the weld bead flush with the base material on both sides.
- Place the strip in a press or vise. Bend it into a U-shape. For a “root bend,” the root of the weld is on the outside of the bend. For a “face bend,” the face is on the outside.
- What to Look For: A quality weld will bend without cracking. If you see cracks or tears open up along the fusion line or within the weld metal, it indicates a problem like lack of fusion or embrittlement.
Fillet Break Test
This test is specific to fillet welds (T-joints) and is excellent for checking root penetration and fusion.
- Equipment: A heavy hammer and a sturdy workbench.
- Process:
1. Create a T-joint by welding a fillet on one side of two plates.
2. Position the joint so you can strike the back of the vertical plate with a hammer, attempting to bend it flat and break the weld.
- What to Look For: Inspect the fractured weld surface. You should see a clean break through the weld metal, not along the fusion line. Check for porosity or other internal defects now exposed. A lack of penetration into the root of the joint will be immediately obvious.
Macro-Etch Test
This test gives you a cross-sectional view of the weld, revealing penetration, fusion, and the internal structure.
- Equipment: A saw or grinder with a cutting wheel, sandpaper (progressing to a fine grit), and an etching solution (e.g., a mild nitric acid solution—use with extreme caution and proper PPE).
- Process:
- Cut a cross-section through your welded coupon.
- Sand the cut face smooth, working up to 400-grit or finer sandpaper for a near-mirror finish.
- Carefully apply the etching solution according to its instructions. The acid will eat away at the different metal structures at slightly different rates.
- Neutralize the acid and examine the surface.
- What to Look For: The etch will clearly reveal the weld bead profile, the depth of penetration, the fusion at the toes, and the HAZ. It’s the best way to diagnose issues like incomplete fusion or inadequate penetration.
When to Consider Nondestructive Testing (NDT)
For critical applications, nondestructive testing is used. While these methods often require certified inspectors, it’s good to know what they are:
- Visual Testing (VT): A more formal version of what was described above.
- Dye Penetrant Testing (PT): A liquid dye is used to find surface-breaking cracks.
- Magnetic Particle Testing (MT): Used on ferrous materials to detect surface and near-surface flaws.
- Ultrasonic Testing (UT): High-frequency sound waves are used to find internal defects.
Common Welding Defects: Causes and Corrective Actions
Understanding why a defect occurred is key to preventing it. Here is a library of common issues and their fixes.
Porosity (Gas Pockets)
Cause: Contamination of the weld pool. Dirty or wet base metal, inadequate shielding gas flow (too low or too high), wind/drafts, or contaminated filler wire.
Action: Thoroughly clean the joint. Check gas flow rate at the nozzle. Shield the arc from drafts. Use fresh, dry consumables
Lack of Fusion
Cause: Insufficient heat input, incorrect torch angle, or traveling too fast. The weld metal fails to fuse with the base metal.
Action: Increase amperage/voltage. Maintain a proper work angle (push or pull depending on the process). Slow your travel speed to allow the puddle to melt into the base metal.
Lack of Penetration
Cause: Heat input is too low, travel speed is too fast, or joint design is poor (root gap is too small).
Action: Increase amperage. Slow down. Ensure your joint preparation allows the arc to reach the root of the joint.
Undercut
Cause: Excessive amperage or voltage, incorrect torch angle, or excessively long arc length. The arc gouges the base metal.
Action: Reduce heat settings. Focus the arc on the weld pool, not the base metal. Use a slight pause at the toes of the weld to allow filler metal to fill in.
Overlap
Cause: Insufficient heat input or incorrect technique. The filler metal sits on top of the base metal instead of fusing with it.
Action: Increase amperage. Use a steeper work angle to direct the arc’s force into the joint.
Burn-Through
Cause: Excessive heat input for the material thickness or a root gap that is too wide.
Action: Reduce amperage/voltage. Increase travel speed. Use copper backing plates to help absorb heat.
The Key to Repeatability: Documentation Basics
For a professional shop, consistency is everything. Documenting your procedures ensures that any welder can replicate a quality weld. This is where a Welding Procedure Specification (WPS) and a Procedure Qualification Record (PQR) come in.
- WPS (Welding Procedure Specification): This is the recipe. It’s a formal document that details all the parameters needed to make a specific weld, including process, material grade, filler metal, amperage, voltage, gas type, and joint design.
- PQR (Procedure Qualification Record): This is the proof. It’s the record of the actual test weld made using the WPS, including the results of visual and mechanical testing. It validates that your “recipe” works.
Even if you don’t need formal certification, adopting the practice of logging your parameters is invaluable. A simple notebook or spreadsheet can work wonders.
Simple Weld Log Template:
|
Date |
Project/Joint ID |
Material Type & Thick. |
Filler Wire/Rod |
Gas Type & Flow |
Voltage (V) |
Wire Speed/Amps (A) |
Travel Speed |
Test Results |
Notes/Observations |
|---|---|---|---|---|---|---|---|---|---|
|
10/28/2025 |
T-Joint Test |
1/4″ A36 Mild Steel |
ER70S-6 0.035″ |
75/25, 25 CFH |
19.5V |
280 IPM |
Moderate |
Bend Test Pass |
Clean bead, good toe fusion |
A Practical QA Cadence for Small Shops
Integrate quality checks throughout your workflow, not just at the end.
- Incoming Material Check: Verify you have the correct base metals and filler materials. Check for rust, mill scale, or oil.
- Fit-Up Verification: Before striking an arc, check that the joint prep, root opening, and alignment match your plan. A poor fit-up makes a quality weld nearly impossible.
- First-Article Signoff: Weld a test coupon using the planned settings. Perform a visual and destructive test to confirm the procedure is sound before welding the final piece.
- In-Process Checks: Briefly stop to inspect the weld periodically, especially on long runs.
- Final Inspection: Perform a full visual inspection and any required NDT on the finished product.
Safety First, Always
When performing destructive tests, remember that you are dealing with significant forces.
- Always wear safety glasses, gloves, and appropriate PPE.
- Ensure your press and tools are in good condition.
- When using chemical etchants, wear chemical-resistant gloves and goggles, and work in a well-ventilated area. Follow all manufacturer instructions.
From Good to Great
Achieving consistent weld quality is a journey of continuous improvement. By moving beyond just the visual appearance of a bead and embracing a structured approach to inspection, testing, and troubleshooting, you elevate your skill and the value of your work. The discipline you build through these practices directly translates into stronger, safer, and more professional results.
Ready to equip your shop with the best tools for the job? Explore our wide range of welding supplies and cutting-edge equipment, or contact our team for a consultation to optimize your welding procedures.